Gardening
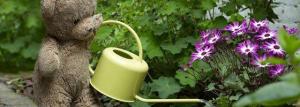
One way to spend time outside with the children (any age from two up) is to work in the garden. A garden is more than just plants. It’s also a home for birds, bees, butterflies, earthworms and other creatures that help the garden grow.
Children love to care for other living things, and plants are an easy choice that can give a great sense of accomplishment. Check with your host parents about where you can garden. Ideally, your little garden will have at least six hours of sun a day.
For outdoor gardening you will need to buy some seeds. If your garden has less than six hours of sun, choose seeds that can grow in “partial” sun. Select flower seeds that germinate quickly. The back of the seed packet will tell you how long before the plants sprout. Marigolds and morning glories are easy to grow and will come up quickly. Buying vegetable seeds will allow children to eat and share what they grow. Radishes are the fastest growing vegetable – from seed to salad in just three weeks. Green beans, tomatoes, summer squash and cucumbers are other good choices, but they do take longer. Be sure to plant extra seeds because not every one will germinate. This is an important lesson for children – mistakes are natural and an inevitable part of life. If you are starting late and want to make sure you will have a vegetable harvest, you can also buy small plants at a local plant nursery.
Before you plant the seeds, use a shovel, trowel or spade to loosen the soil. Remove weeds, stones and grass from the area. If the soil is very hard (like clay) or very sandy, it would be a good idea to add peat moss or compost to the soil. You will also need a hose or a watering can so that the children can water the earth when it doesn’t rain. If the plants look droopy or the soil feels dry, it is time to water. It is very important to water even before the plants sprout. It is best to water early in the morning or in the late afternoon.
Gardening includes other simple science lessons, all concepts that children can understand. Plants lean or turn towards light. Plants use water, but some of it evaporates into the air. What happens to the water that has evaporated? Without water plants will dry up and die. Plants come from other parts of the world, and sometimes their form gives clues to their origin. Can you find seeds that are native to your country?
When you go out into the garden, take care of the plants, pulling up weeds gently and also any sprouted seeds that are growing too close to another plant. But also look around and look closely at the ground to find birds and bugs that are a part of gardening. You can discuss how living things rely on plants to live, and how the plants need their animal friends. Birds spread seeds; earthworms loosen the dirt for the roots of the plants. What do bees do?
Look for books about gardening in the library. Carrot Seed by Ruth Krauss is a wonderful book for very young children. Take photographs of your gardening project. It will be surprising and satisfying to look at the starting photos at the end of the harvest. And don’t forget to put on sunscreen before you do your gardening!
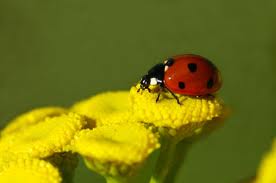
Lady Bug
Talking to children about insects is a fun activity in the summer when there are so many around!
Some easy facts for you to know:
- There are more kinds of insects than any other kind of animal.
- They live all over the world, even in ice and snow.
- They never have more than 3 pairs of legs. If it has more, it’s not an insect!
- All insects come from eggs.
Outside Activity: To learn more about insects, go on a hunt outside. Collect the insects you find in a jar and then examine them with a magnifying glass.
Recipe: Make a snack of “ants on a log.” Spread peanut butter on a stick of celery and then add raisins on the top.
Read: Children up to age seven will enjoy “The Very Hungry Caterpillar” by Eric Carle. Look for it in the library.
Inside activities:
- Make a caterpillar from a cardboard egg carton cut in half lengthwise. Turn each section upside down to paint with water-based paint. Use pipe cleaners to make the antennae. Draw or glue eyes and a mouth.
- Make a butterfly by putting small pieces of colored tissue paper in a clear sandwich bag. Seal the bag. Squeeze the bag in half with the sealed edge at the top. Twist a tie around the middle and adjust the end of the twist tie to make antennae.
 What is Daylight Saving Time?
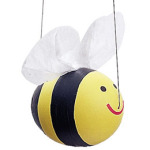
 Celebrate the arrival of spring by bringing this fuzzy critter to life.Begin by mixing 3/4 cup of potting soil and 2 tablespoons of grass seed in a bowl. Add water to moisten the mixture, then set it aside.Cut away a three-cup section of an egg carton, then trim the section along the longer edges so that your grassapillar will look the same from both sides. With a permanent marker, draw a face on one end as shown. Gently spoon the seed mixture into the cups.
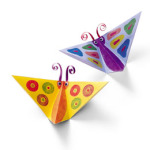 Origami Butterfly
 This colorful creature is created not by metamorphosis but by folding the origami paper in half to form a triangle.
 Fold the triangle in half again.
 Unfold the second triangle, then fold each side so that it crosses the center crease at a right angle.
 (Continuation of above directions.)
 Unfold. Glue on the strips for antennae and curl them using the edge of a scissor. Glue on the googly eyes and decorate with markers.