Tag Archives: host families

Child Proofing

3281882201_14ba77f870

With shorter days and colder weather, you and the children are probably spending more time inside the house. Please be sure that the house is “childproof” with these simple tips:

  • Children are curious; many small children put everything into their mouths. Be sure no small objects are within the child’s reach.
  • Plastic bags, long cords and very soft pillows can be dangerous to children.
  • If a toy gets broken and has sharp edges, keep it away from children!
  • Be sure that laundry soap and other cleaners are out of reach of the children.
  • Don’t leave any medicines in reach of children, not even vitamins.
  • Keep scissors and knives out of reach.
  • Store the toys that belong to older children out of reach of babies and toddlers.
  • Many cosmetic items and toiletries, such as mouthwash, perfume, nail polish, and hair spray, are poisonous. Keep them out of children’s reach.

How to Say Goodbye Around the World


How to Say Goodbye

The English word “goodbye” is derived from the pharse “God be with you.”  Parting words in other languages are similar. In Spanish, it’s adios (ah-dee-ohs), in French adieu (ah-dyur).  Both words literally mean “to God”.

There are other ways to “goodbye”, however.  English children shout “Cheerio” when parting and in Switzerland. Germany and Italy they say ciao (chow) which is the informal way of saying “goodbye” in Italian.

A wave  of the hand accompanies most goodbyes, at least in the West.  In Japan, people bow when they part, and Hindus press their hands together and say “Namaste”, just as they do when greeting one another.

In some households, in India, it’s considered a bad omen to say “goodbye”.  Instead people say, “go and come back”.  If you are the one leaving , you announce, “I’m going and I will be back.”

How many languages can you teach your host kids to say “goodbye”.  Amaze your host parents at by having the kids say goodbye from around the world at the dinner table.


Handling Expenses

Host parents often ask for suggestions on how best to handle common expenses that occur as au pairs are caring for the children.

Miscellaneous Expenses

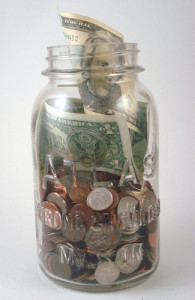
There are different ways to handle the little day to day expenses that come up.  Things like when an au pair takes the kids out for ice cream or picks up a gallon of milk.  Some families keep a cookie jar fund, a little cash that they set aside weekly or monthly for these types of expenses. Others give their au pair a prepaid debit card for this purpose. Below are some suggestions for avoiding problems with expenses.

Host Families

  • It’s important to be clear about how long this money should last and what types of expenses are approved.
  • Let the au pair know whether or not you expect receipts.

Au Pairs

  • Only spend the money on approved expenses.
  • If it is something you are not sure about, ask first.
  • Put your receipts in the cookie jar in place of the money to avoid any confusion.

Gas and Fare Cards 

Host families are responsible for the au pair’s transportation costs: to and from classes, cluster meetings and when driving the kids.

It is a good idea to figure out how much gas an au pair will use for these trips and either put gas in the car or give a gas allowance.   If your au pair is riding to classes or cluster meetings with another au pair, you should offer to share the cost of gas.

Au pairs are responsible for their own transportation at all other times.  You should replace the amount of gas used for personal use.

Photo: Andrea Travillian

Winter Sports and Sports Insurance

Is it risky to do winter sports without the sports insurance?
ice-skate

Yes. If you have to pay your own hospital bills for a broken bone, you might be shocked at how much that would cost. I checked this website for some cost estimates.

Here are a couple examples:

  • Without medical coverage, to treat a broken arm or leg (that does not require surgery) it could cost up to $2,500.
  • Without medical coverage, to treat a broken arm or leg (requiring surgery) it could cost $16,000 or more.

I wanted to make sure everyone understands how the medical coverage works for sports related injuries. There is a list of “high-risk sports/activities” that are not covered with the basic or upgrade medical insurance plans. Those activities are only covered with the Sports Insurance Package (also known as Option A.)

The Sports Insurance Package was available pre-departure and may also be purchased at any time during your year. It takes effect within 48 hours of your enrollment and it is good for 12 months. The cost will be the same ($75) whether you have a month left or your whole year ahead of you. I recommend you pay for it early on, if you didn’t already purchase it. You never know when an opportunity might present itself and you don’t want to miss out on an adventure. You also don’t want to take a risk on getting injured and being responsible for the bill on your own.

Below is a partial list of sports that are only covered with the sports insurance package:
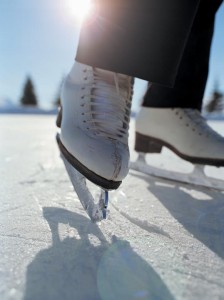
Football, Rugby, Scuba diving, Ski-doo, Wakeboarding, Skydiving, Parachuting, Rock climbing, Zip line, Skate boarding, Rollerblading, Roller skating, Ice Skating, Skiing, Snowboarding, Snowmobiles & Snowshoeing. View the full list on page 3 of the insurance brochure HERE (2013 arrival au pairs) & HERE for (2014 arrival au pairs)
Note: Injuries sustained while partaking in these sports are covered with purchase of the Sports Insurance ONLY.

How to register for the Sports Insurance
Download the form HERE and follow the instructions. It takes a few days for your coverage to begin. If you think you will be doing any of these sports, you should get it now.

Ash Wednesday – February 13th – religious holiday


A priest marks a cross of ashes on a worshipper's forehead.

Ash Wednesday, in Christian churches, is the first day of the penitential season of Lent. On Ash Wednesday some Christians have a smudge of ashes placed on their foreheads as a sign of penitence.

Filed underBlog Tags, , , , , , , , , , ,

Valentine’s Day! February 14th!

Globe Heart

Valentine’s Day is February 14th!

Au Pairs give loving care to their host families every day. Au Pair in America has provided 27 years as the world’s most experienced intercultural childcare program.

Au pairs become full-fledged family members, sharing a cultural exchange experience that often leads to a lasting relationship with the host family.

Au Pairs come to the USA for cultural exchange and to provide childcare to busy families. They stay for one year and then have the option to extend for a second year. Au Pairs are 18 to 26 years old when they arrive in the USA. Please check out www.aupairinamerica.com for more information!

Au Pairs will be making Valentine cards with their host children. Here’s how:

What you’ll need:

  • 8.5 x 11 construction paper or card stock in various colors and/or patterns easy-homemade-valentines-kaboose-craft-photo-350-fs-IMG_9049_rdax_65
  • Valentine and/or heart stickers
  • Scissors
  • Pinking shears (optional)
  • Glue stick or white craft or school glue
  • Glitter (pink, red, white)

How to make it:

  1. Begin by cutting a piece of construction paper or card stock into four equal pieces.
  2. Fold quartered paper in half to make a card.
  3. For the easiest version, appropriate for preschoolers, use stickers to decorate or cut out hearts from a different color of construction paper or card stock to glue onto your cards. Experiment with different patterns, florals look great contrasted with stripes on a solid background.
  4. Younger children love glitter! Use a bottle of glue to “draw” on a heart or phrase (such as “Be Mine”). Sprinkle glue generously with pink, red or white glitter and let dry over night. Tap off excess glitter when completely dry.
  5. For the older set, let them use pinking sheers to cut out heart shapes and glue onto cards. Again, use contrasting patterns and colors to create a charming design.
  6. Once glue is dry, cards may curl up a little. Place cards between the pages of a heavy cookbook or phone book and leave over night.

Valentine's Day

Holiday Reminders for Au Pairs and Host Families

With the holiday season just around the corner, it is important to review this little reminder about program rules for holidays and vacations.luggage malias

Holidays

  • Host families are NOT REQUIRED to give au pairs any specific holidays.
  • Each host family will make different arrangements on holidays, some au pairs will be off and others will be required to work.
  • Au pairs should NOT make plans for holidays without checking with your host family FIRST.

Vacation

  • Au pair earns 2 weeks of paid vacation during the course of her year.
  • The host family can pick a week and the au pair can pick a week, if an agreement is not reached.
  • All vacation should be preplanned (at least 4 weeks in advance.)
  • All au pair’s friends and/or family visits/vacations should be pre-approved prior to purchasing a ticket.
  • If an au pair travels with their host family, it should be discussed UP FRONT whether this is the au pair’s vacation or if she is working.
  • If an au pair travels with the host family to work, the host family is required to pay for her transportation, lodging and meals.

Keep these things in mind as you plan your travel and we wish everyone a safe and happy holiday season!

Important: An au pair MUST have her DS2019 signed PRIOR to her departure from the US. More info. about this can be found on the right side of this page under “Travel Links for Au Pairs.”

Safe Driving in Winter Weather

Winter Driving Tips
You are likely to find ice and snow on the roads in many parts of the country. There are some basic rules to remember to stay safe in the car in difficult driving conditions:

  • Start early and take your time.
  • Accelerate slowly, especially on hills
  • Drive slowly to avoid having to stop while going up a hill, as it will be hard to start again.
  • Don’t make any sudden turns or stops.
  • Be sure that the mirrors and windows are always free of snow and ice.
  • If you skid, try to steer in the direction the car is sliding to regain control.
  • The changes in temperature sometimes cause potholes in the streets. If you don’t see the pothole in time to steer around it, apply the brakes before hitting the pothole and release them just before you reach the pothole. If you keep the brake on as you hit the pothole, it will do more damage to the tire.
  • Try to keep your gas tank at least half full.
  • If your wheels spin on ice, switch to low gear, even on automatics.
  • Leave extra space between you and the car in front of you.
  • Remember that bridges and exit ramps are icier than roads.
  • Ask what kind of brakes your car has and how to use them in case of a skid.

Wet Weather Driving Tips (from www.nyAAA.com)

  • Summer rainstorms can quickly reduce visibility and create dangerous driving conditions.
  • In stormy conditions, it is more difficult to see other vehicles, road signs and the road itself. It is critical that motorists take steps so they can see and be seen.
  • Drivers should regularly clean their windshield and windows, on both the inside and outside. Drivers who smoke should take extra care to make sure their interior windows are clear of a buildup of smoke residue.
  • AAA also suggests that motorists regularly check that headlights, taillights, brake lights and turn signals are working properly.
  • As soon as rain begins, AAA recommends drivers turn on headlights and windshield wipers. Many states require headlights to be turned on when it is raining or if the visibility is reduced to less than 500 feet.
  • When visibility is so limited that the edges of the road or other vehicles cannot be seen at a safe distance, it is time to pull over and wait for the rain to ease up. It is best to stop at a rest area or other protected location. If the roadside is your only option, AAA recommends pulling off as far as possible, preferably past the end of a guardrail. Keep headlights on and turn on emergency flashers to alert other drivers.
  • In addition to reducing visibility, rain creates slippery roads that require motorists to use extra caution. AAA suggests that when driving in rain, motorists slow down and increase the distance between vehicles to compensate for reduced tire traction.

Safety Tips

Back to School Safety Tips

It won’t be long and school will be starting again. It is time to go over a few, simple rules.  Practice with your host children how to safely wait for and board the school bus. Go over safe bicycling procedures if they’ll be riding. And don’t forget children who are in your car. They are at particular risk and need your guidance.

School_Bus_Cartoon_1

Riding the Bus

  • Have a safe place to wait for your bus, away from traffic and the street.
  • Stay away from the bus until it comes to a complete stop and the driver signals you to enter.
  • When being dropped off, exit the bus and walk ten giant steps away from the bus. Keep a safe distance between you and the bus. Also, remember that the bus driver can see you best when you are back away from the bus.
  • Use the handrail to enter and exit the bus.
  • Stay away from the bus until the driver gives his/her signal that it’s okay to approach.
  • Be aware of the street traffic around you. Drivers are required to follow certain rules of the road concerning school buses, however, not all do.

crossing street2

Walking and biking to school

Even if you don’t ride in a motor vehicle, you still have to protect yourself. Because of minimal supervision, young pedestrians face a wide variety of decisions making situations and dangers while walking to and from school. Here are a few basic safety tips to follow:

  • Mind all traffic signals and/or the crossing guard — never cross the street against a light, even if you don’t see any traffic coming.
  • Walk your bike through intersections.
  • Walk with a buddy.

Wear reflective material…it makes you more visible to street traffic.

Riding in a car

carseat2

Safety belts are the best form of protection passengers have in the event of a crash. They can lower your risk of injury by 45%. You are four times more likely to be seriously injured or killed if ejected from the vehicle in a crash.

Remember: One Person – One Belt

  • Everybody needs a child safety seat, booster seat, or safety belt!
  • There must be one safety belt for each person. Buckling two people, even children, into one belt could injure both.
  • Everyone needs to be buckled up properly. That means older kids in seat belts, younger kids in booster seats and little kids in child safety seats.
  • The back seat is the safest place in a crash. Children age 12 and under should ride properly restrained in back. Infants riding rear-facing must NEVER be placed in front of an airbag.
  • People who are not buckled up can be thrown from the car or around inside the car, and seriously hurt themselves or others.
  • Never hold a child on your lap! You could crush him/her in a crash, or the child may be torn from your arms.
  • Never ride in the cargo area of a station wagon, van, or pickup! Anyone riding in the cargo area could be thrown out and severely injured or killed.
  • No one seat is ‘best’, The ‘best’ child safety seat is the one that fits your child and can be installed correctly.

CHOOSING AND USING THE CORRECT SEAT

AGE: Birth to 1 year
WEIGHT: Up to 35 pounds
TYPE OF SEAT: Infant-only or Rear-facing Convertible
DIRECTION TO FACE: Infants should ride rear-facing to at least 1 year of age AND at least 20 pounds, longer if possible. The seat should be at a 30-45 degree angle to keep the child’s head from falling forward. Do not tip it too far back or the child could come out of the seat in a crash.
NOTE: Infants who outgrow a smaller infant-only seat before 1 year of age should ride rear-facing in a child safety seat with a higher rear-facing weight limit (over 22 pounds).
AGE: Over 1 year to 4 years old
WEIGHT: Over 20 pounds, up to 40 pounds
TYPE OF SEAT: Convertible or Forward-Facing Only seat
DIRECTION TO FACE: A child over 1 year of age AND over 20 pounds may ride facing forward. Use the upright position or the position recommended by
the manufacturer.
NOTE: Keep the child in a child safety seat with a full harness as long as possible, preferably until 4 years old. For children 40 pounds or more who are too young or too active to sit still in a booster seat, or if a vehicle has only lap belts, look for child restraints with harnesses labeled for use over 40 pounds.
AGE: 4 to 8 years old
WEIGHT: Over 40 pounds
TYPE OF SEAT: Belt-positioning Booster Seat, backless or high-back
DIRECTION TO FACE: Forward-Facing
NOTE: All children who have outgrown child safety seats should be properly restrained in booster seats until they are at least 8 years old, unless they are 4′ 9″ tall.

Filed under