Supplies
Downloadable instructions
1 dowel rod- 2 feet long (3/16” diameter)
1 dowel rod- 3 feet long (3/16” diameter)
Pencil
Wood glue
Craft knife
Nylon, plastic, fabric or paper
Tape or glue
Lightweight string or fishing line
Ribbon or repurposed fabric
Kite string (on a spool) or lightweight string and a cardboard roll
Scissors
Instructions
1. Take your 3-foot long dowel rod and measure a foot from the top of the stick, making a mark with your pencil. Center the 2-foot long stick horizontally on top of the longer stick where you made the mark, creating a cross shape.
2. Attach the two dowel rods where they intersect with a couple dabs of wood glue. Once the glue has dried, use your string to weave in and out of the four posts until the two sticks are sturdy. Secure the end of the string with a dab of glue.
3. Use your craft knife to cut a small notch in the end of each point of your kite’s frame. Starting at the bottom notch in the cross, wrap a piece of string or fishing line all the way around, securing it in each of the four notches. Upon reaching the bottom of the cross, tie the string or fishing line into a knot.
4. Once you’ve built the frame of your kite, lay it atop one of the following materials:
5. Trace the outline of the frame onto your material, measure 2” from each of the four sides, and draw a 2” wide border.
6. Cut out your material and make a slit in each of the four corners so the material doesn’t bunch when you fold the border. Lay the material on top of the frame, and wrap the border around the outer string or fishing line of the kite. Use glue or tape to adhere your material of choice in place.
7. Make the kite’s bridle—an arrangement of strings attached to the bottom of your kite that allows it to maneuver. The bridle is also what you’ll tie your kite string to in step 8. To make the bridle, Cut a 3 1/2’ piece of string, and tie one end around the top of the frame. Make a small loop one-third of the way down the string and tie it in a knot. Tie the open end of the string to the bottom of the frame.
8. Tie your kite string or a lightweight string to the loop in the bridle. If using string that doesn’t come in a roll, wrap it around a cardboard roll.
9. To make the kite’s tail, tie a 6’ long piece of string or fishing line to the bottom of the frame. Knot several short pieces of ribbon or strips of repurposed material to the string, each about 8” apart. After completing this step, you’ll be ready to fly!
Flying Your Kite
Tip: If you’re having trouble getting your kite in the air, try letting out a small length of string and begin to run with your kite until it’s lifted by the wind.
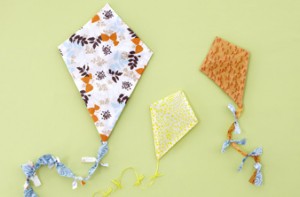
Tip: When you’re done flying your kite, consider hanging it as décor. We love the look of a kite hanging in a child’s bedroom. Try making a few kites of different sizes, and display them in a whimsical arrangement.