Tag Archives: activities

Witch’s Broom Treat Bag.


2012_witch_broom_treat_bags

What You’ll Need:

  • Brown Paper Lunch Bags
  • Scissors
  • Rubber Bands
  • Ribbon, String, or Yarn
  • Sticks (from your yard)
  • Candy


  • Easy Step-by-Step Directions:
  1. Create the broom’s bristles by cutting one of the paper bags in 1⁄2″ strips from the very top (where the bag opens) to the very bottom, stopping at the part of the bag that sits flat on the table top.
  2. Lay the cut paper bag flat on the table.Place the uncut paper bag on top of the cut paper bag, so that the bottoms are sitting exactly on top of one another.
  3. Fill the uncut paper bag about one-quarter full with the candy of your choice.
  4. Put the stick in the middle of the uncut paper bag.
  5. Bring the loose strips of the cut paper bag up and around the sides of the uncut paper bag. Holding both bags tightly against the stick (about half way up) secure with a rubber band.
  6. Tie a piece of string, yarn, or ribbon tightly around the paper bags, concealing the rubber band. Trim excess paper bag.

Use bags as favors/place cards at your next Halloween or Thanksgiving party. Simply print your guests names on cardstock, cut out, and attach to the fronts of the bags!

Spooky Tree Centerpiece


Spooky_Tree_centerpiece

What You’ll Need:

  • Black Plastic Cauldron
  • Floral/Craft Foam
  • Glass Gems, Rocks, or Stones
  • Halloween Tinsel Garland
  • Plastic Skeleton Garland
  • Twigs from Your Yard
  • Paint & Paint Brush (Optional)
  • Glittery Bat Ornaments
    Easy Step-by-Step Directions:
  1. First, gather a few spooky-looking twigs from your yard.
  2. Place the floral/craft foam in the center of the cauldron and fill the empty space around the foam with glass gems, rocks, or stones. This will anchor your foam and provide stability for your tree.
  3. Stick the twigs from your yard securely into the foam…make sure you push them far into the foam for stability. Arrange twigs into your desired tree shape. If you want to paint your twigs black or another color, do that next. They will be easier to paint standing upright in the foam. Set the tree aside to dry.
  4. Once the twigs are dry,cover the stones at the base of the tree with Halloween tinsel garland, then place the skeleton garland on top of the tinsel and position the skeletons however you wish.
  5. Decorate the tree with more skeletons, Halloween creepy creatures, or handmade glittery bat ornaments.

October is National Pizza Month

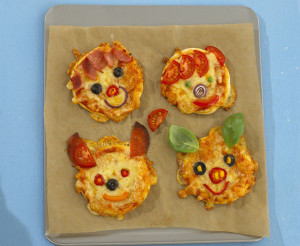
Click here to get the recipe for Animal Face Pizzas on Annabel Karmel's BlogClick here to get the recipe for Animal Face Pizzas on Annabel Karmel’s Blog

Pizza is easy and fun to make and can be a nutritious meal for the children and is easy to make at home.

You will need a ready-made pizza dough or a ready-made crust, shredded mozzarella cheese and a jar of pizza sauce.  First the dough or crust goes on a cookie sheet or pizza pan. Then spread the sauce, add the other toppings, and last of all, sprinkle the cheese. Bake as directed for the crust. Be careful, and keep the children away from the oven as the oven must be very hot to make a nice crusty pizza.

If you want to get a little fancier and try these Animal Face Pizzas, click on the photo to get the recipe.

Click here for a coloring page where kids can draw in toppings and make their own pizza.

Edelweiss Hat- Celebrate Germany!

edelweiss hat

Oktoberfest in Germany celebrates the harvest – which ironically end at the end of September.  In Germany, celebrations for Oktoberfest are from September until the first weekend in October.  In the USA,  Oktoberfest is celebrated throughout the month of October (probably so we don’t get confused by the name?).     In honor of our German au pairs who are planning the Cultural Connection this month at our business meeting, here is a craft to do with your kids.

In the region of southern Germany known as Bavaria, you’ll often see men and boys in traditional folk hats graced with a feather or an edelweiss, a delicate Alpine flower. Our paper version of these hats offers both.

To make one, fold the green construction paper in half to make it 9 by 12 inches. Fold the two creased corners toward the center to make two 6-inch right triangles, leaving 3 inches at the bottom. Fold each 3-inch flap in half, then fold up again to form the brim. Cut a flower shape out of the white paper, glue on the yellow circle, and glue it to the hat’s brim. To make the chin strap, punch holes on each side of the hat’s brim, string the elastic through, and knot at each end. For a final touch, stick the feather in the fold of the hat.

MATERIALS

12 x 18-inch sheet of green construction paper
Scissors
3 x 3-inch square of white paper
Glue stick
Yellow paper circle, 1 inch in diameter
Hole punch
2 feet of elastic
Feather

Caramel Apples


Make some caramel apples with your kids to get into the carnival vibe and enjoy some yummy treats.

applesAll you need are apples, cubes of caramel, and milk!
  1. Remove the stem from each apple and press a craft stick into the top.
  2. Butter a baking sheet
  3. Place caramels and milk into a microwave bowl and microwave for 2 minutes.
  4. Roll each apple with caramel sauce and place on sheet to set.

PS – You can use treats like nuts, cookies, etc. to add some extra flavor! (Always check for allergies before serving)

Checklist Place Mat

checklist
Table your constant stream of morning reminders with this clever place mat, which allows kids to take responsibility for their own must-dos.
Materials
  • Decorative paper
  • Scissors
  • Glue stick
  • 18- by 12-inch sheet of poster board
  • Markers
  • Clear Con-Tact paper (or have it laminated at a copy shop)
  • Nontoxic dry-erase marker
  • Adhesive-backed Velcro dot
Instructions
  1. Cut three 6- by 12-inch rectangles from decorative paper. Use a glue stick to affix them side by side onto the poster board.
  2. Write a “Do at Home” checklist on the left rectangle and a “Take to School” checklist on the right one (leave a few blank spaces at the bottom of each list for write-in reminders).
  3. Have the place mat laminated at a copy shop or cover it with clear Con-Tact paper. Your child can use a nontoxic dry-erase marker to check off items or write additional reminders. Affix an adhesive-backed Velcro dot to keep the marker in a handy spot on the mat.

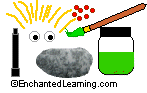
Make Your Own Blarney Stone

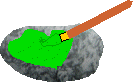
Blarney Stone CraftIn this simple project, a smooth river rock is turned into a small, kissable Blarney Stone.In southwestern Ireland, there is a very famous stone, called the Blarney Stone. It is located high up in Blarney Castle. If you kiss the Blarney Stone, it is supposed to give you the gift of eloquence.
Supplies needed:

  • A smooth, clean river rock
  • Brush
  • Green paint
  • Glue
  • Markers
  • Glitter, sequins, plastic jewels, googly eyes, bits of yarn, etc.
Make sure your rock is clean and dry. Paint the rock green.
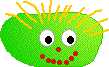
After the paint is dry, decorate your rock using glitter, sequins, beads, plastic jewels, googly eyes, bits of yarn, or other interesting items.
When the paint and glue are dry, add details (like eyebrows, etc.) using markers.You now have your own small Blarney Stone to help you celebrate St. Patrick’s Day.


Dr. Seuss Week — A Week to Celebrate Reading

cathat3

This week (March 1-5) many schools throughout the United States are celebrating the birthday of Dr. Seuss.  To honor Dr. Seuss’ love of reading and his inspiration for kids and adults alike,   March 3 is Read Across America Day. The National Education Association sponsors events to inspire reading in children throughout our schools and communities.

Dr. Seuss wrote many childrens books – Cat in the Hats, Green Eggs and Ham, Hop on Pop to name a few.  In the cluster monthly Kids Activity Kit for March, there is a Dr.Seuss Reading Rewards Card for each host child.  Punch out the colored dots for each book the children read.  After 15 books, complete the Dr. Seuss Reading Certificate and reward the children with a Dr. Seuss pencil (included in the kit).

My son’s school developed a week of celebrations based on the themes of the Dr. Seuss books.  This is a fun activity to do with your host kids at home.   Dig out the Dr. Seuss books – you will be surprised how much fun the books are to read and the rhyming will help improve your english.

Monday – “Red and White Day” – wear red and white to show Seuss Pride.

Tuesday – “Cat in the Hat Day” – wear your favorite hat to school.

Wednesday – “Grinch Green Day” – wear green, but don’t be as grumpy as the Grinch

Thursday- “Fox in Socks Day” – Roll up your pant legs and show off your cool socks.

Friday – “Sneak Up on Reading Day” – Wear your favorite sneakers and participate in “Drop Everything and Read.”

Check out the Dr. Seuss website

Seussville

for more ideas, printables and on line games to play with the kids.  Enjoy!


Handling Expenses

Host parents often ask for suggestions on how best to handle common expenses that occur as au pairs are caring for the children.

Miscellaneous Expenses

There are different ways to handle the little day to day expenses that come up.  Things like when an au pair takes the kids out for ice cream or picks up a gallon of milk.  Some families keep a cookie jar fund, a little cash that they set aside weekly or monthly for these types of expenses. Others give their au pair a prepaid debit card for this purpose. Below are some suggestions for avoiding problems with expenses.

Host Families

  • It’s important to be clear about how long this money should last and what types of expenses are approved.
  • Let the au pair know whether or not you expect receipts.

Au Pairs

  • Only spend the money on approved expenses.
  • If it is something you are not sure about, ask first.
  • Put your receipts in the cookie jar in place of the money to avoid any confusion.

Gas and Fare Cards 

Host families are responsible for the au pair’s transportation costs: to and from classes, cluster meetings and when driving the kids.

It is a good idea to figure out how much gas an au pair will use for these trips and either put gas in the car or give a gas allowance.   If your au pair is riding to classes or cluster meetings with another au pair, you should offer to share the cost of gas.

Au pairs are responsible for their own transportation at all other times.  You should replace the amount of gas used for personal use.

Photo: Andrea Travillian

Valentine’s Day Activities.

Valentine’s Day (February 14) is a time of love, friendship, giving, and caring. Americans use Valentine’s Day as an opportunity to tell friends and family how much they care.  Children usually exchange cards at school.

Are you looking for Valentine’s day activity and craft ideas?

Look no further…  Au Pair in America has a Pinterest pinboard devoted to Valentine’s Day:

APIA Valentine’s Day Pinboard

Photo: Clever Cupcakes (Flickr)