Tag Archives: craft

How to Manage Longer Days with Children – When School is out and Camp isn’t On!

Summer -  Ryan HydeHere are some ideas to keep your kids busy this summer!

Top Ten – How to Manage Longer Days with Children – When School is out and Camp isn’t On!
Au pairs should always check with their host parents to seek approval for any childcare activities.

10. Start A Summer Scrapbook!
Include drawings, pictures, and journal entries of activities from the summer. It will be special because children and their au pair created it together. This could be a hard version, a computer generated one, a movie of daily clips set to music…..they could even make 2 copies – one for her and one for them to keep!

9. Have a picnic!
Spread the planning and preparation across a few days to get them excited!
First, decide on a location, and have a few choices from which the children can pick. For example, their backyard, a town park or near a pond. Include a rain plan – will they choose an alternate in door solution or go on another date? Create ballots and let them vote!
Make the picnic ‘basket’ —- use a plain box and let the children decorate it! Then, decide on a menu — look up recipes and shop for the ingredients together….prepare anything that can be done ahead of time — and then when it is “the day,” finish the picnic packing and go!

8. Switch It UP
Have dinner for breakfast and breakfast for dinner! Plan the menu and prepare together!
Who doesn’t like pancakes for dinner???? (If their host parents don’t, then ignore this one!)

7. Have a Pajama Day!
Plan an indoor PJ day. Choose books to read, cookies to make, a movie to watch, indoor tent with blankets and go! Think of it as a snow day (on a rainy day) in the summer!

6. Six websites with nifty ideas!

Create your own holiday www.educationworld.com/a_lesson/lesson018.shtml
Start a collection www.ehow.com/how_10563_start-collection.html
Scavenger Hunt http://www.lovetheoutdoors.com/camping/kids/scavengerhunt.htm
Build a sandcastle www.sandcastlecentral.com/toolpages/
Plant a garden www.geocities.com/mastergardener2k/
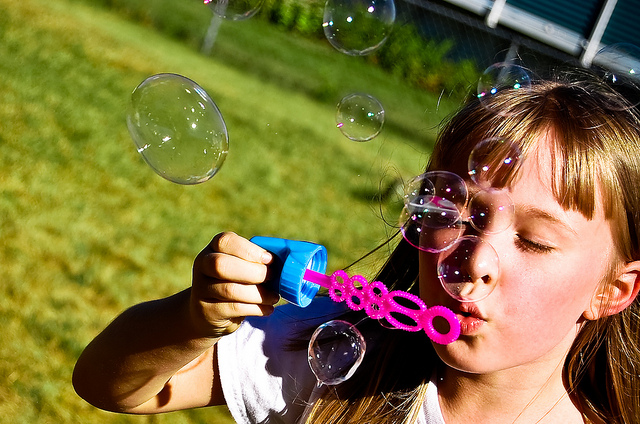
Make a bubble solution www.bubblemania.com/faq/solution.html

5. Park it!

Make a list of area parks. After each visit, have the children critique it….what was good, what did they like about it….what didn’t they like? Create a chart with applicable headings including a rating system. At the end of their comparison, their chart will show them where they like to go for what activities, etc. This is a great hand down tool as well for subsequent au pairs or the parents themselves!

4. Taste Test Day!
Buy several brands of vanilla – and try one bite of each and see what they like best! Or do flavors – let the children choose! Different versions….yogurt tasting, cheese/crackers, salsas or red vs. green grapes!

3. Make a Diorama!

Have children re-create a scene from their favorite book, zoo or outing. http://www.ehow.com/how_12761_make-diorama.html

2. Have a home book club!

Everyone read the same book – and compare your thoughts on it.
Here are some ideas: http://www.scholastic.com/ups/campaigns/src-2015

1. AP Day!

Once a week — have a Day dedicated to the au pair’s country! Eat some foods from her country…and have her share typical summer activities she did growing up. She can read the children a book in her native language as well as teach them how to sing and count! As the children get the hang of it – they can make a list of things they would like her to teach or tell them. Au pairs could even team up to share ‘days’ from their countries with each other’s children!

Photo: Flickr Ryan Hyde
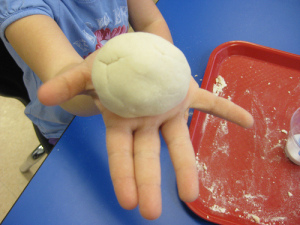
Butterfly Bunch for Mother’s Day


Make a memorable Butterfly Bunch for Mother’s Day this year.  Mount these amazing butterflies on mom’s bathroom mirror on Mother’s Day for a great start to her day.  

Just wing it! No one will believe this wall art is made from toilet-paper tubes from Family Fun!

Tube Crafts Colorful Butterfly Bunch on Wall

Biz Jones

What You’ll Need:

Toilet- and/or paper-towel tubes
Gesso (optional, for brighter color)
Craft paint
Hot-glue gun or adhesive dots
Poster putty

Directions:

1. If desired, prime tubes inside and out with gesso; let dry. Then paint; let dry completely

2. Flatten the tubes and use scissors to cut them into slices. For a large butterfly, you’ll need five ⅝-inch-wide slices. For a small butterfly, you’ll need two ½-inch-wide slices and one ¼-inch-wide slice (eyeball it).

3. To construct the small butterfly: Fold two ½-inchwide slices in half; unfold. Add a dot of hot glue (an adult’s job) to the inside center of each and refold to make a set of wings. Glue the two sets of wings to the sides of the ¼-inch-wide “body.”

4. To construct a large butterfly: Add a dot of glue to the inside center of one of the ⅝-inch slices and squish it together to make a “body.” Add a dot of glue to the flat side and press on another slice for a wing, as shown. Repeat for other three wings.

5. To assemble into artwork: Arrange the butterflies on the floor first; use poster putty to attach them to the wall.

Make Your Own Play Dough

Play Dough - Kevin JarrettMake your own play dough!Play dough is the perfect modeling material for children. Their small hands can pat, poke, pinch, roll and knead it into many shapes. Keep it in an airtight container to use another day, or let it air dry into favorite shapes.

Measure 2 cups of flour, one cup of salt and 4 teaspoons of cream of tartar into a bowl. Add 1/4 cup of oil to one cup of water in a separate bowl then add the mixture to the dry ingredients. For colored play dough, squeeze 10-20 drops of food coloring into the water before you add it to the mixture. Cook the dough at low heat in a wide pan, stirring constantly until it becomes rubbery. Remove the dough from the heat and knead it for a few minutes. When it cools the kids can play too!

Witch’s Broom Treat Bag.


2012_witch_broom_treat_bags

What You’ll Need:

  • Brown Paper Lunch Bags
  • Scissors
  • Rubber Bands
  • Ribbon, String, or Yarn
  • Sticks (from your yard)
  • Candy


  • Easy Step-by-Step Directions:
  1. Create the broom’s bristles by cutting one of the paper bags in 1⁄2″ strips from the very top (where the bag opens) to the very bottom, stopping at the part of the bag that sits flat on the table top.
  2. Lay the cut paper bag flat on the table.Place the uncut paper bag on top of the cut paper bag, so that the bottoms are sitting exactly on top of one another.
  3. Fill the uncut paper bag about one-quarter full with the candy of your choice.
  4. Put the stick in the middle of the uncut paper bag.
  5. Bring the loose strips of the cut paper bag up and around the sides of the uncut paper bag. Holding both bags tightly against the stick (about half way up) secure with a rubber band.
  6. Tie a piece of string, yarn, or ribbon tightly around the paper bags, concealing the rubber band. Trim excess paper bag.

Use bags as favors/place cards at your next Halloween or Thanksgiving party. Simply print your guests names on cardstock, cut out, and attach to the fronts of the bags!

Spooky Tree Centerpiece


Spooky_Tree_centerpiece

What You’ll Need:

  • Black Plastic Cauldron
  • Floral/Craft Foam
  • Glass Gems, Rocks, or Stones
  • Halloween Tinsel Garland
  • Plastic Skeleton Garland
  • Twigs from Your Yard
  • Paint & Paint Brush (Optional)
  • Glittery Bat Ornaments
    Easy Step-by-Step Directions:
  1. First, gather a few spooky-looking twigs from your yard.
  2. Place the floral/craft foam in the center of the cauldron and fill the empty space around the foam with glass gems, rocks, or stones. This will anchor your foam and provide stability for your tree.
  3. Stick the twigs from your yard securely into the foam…make sure you push them far into the foam for stability. Arrange twigs into your desired tree shape. If you want to paint your twigs black or another color, do that next. They will be easier to paint standing upright in the foam. Set the tree aside to dry.
  4. Once the twigs are dry,cover the stones at the base of the tree with Halloween tinsel garland, then place the skeleton garland on top of the tinsel and position the skeletons however you wish.
  5. Decorate the tree with more skeletons, Halloween creepy creatures, or handmade glittery bat ornaments.

Halloween Ghost Jug Decorations


spirit-jugs-halloween-craft-photo-260-FF1007TREATA13

Stationed on a walkway or porch, these homemade lanterns will extend a ghostly greeting and good-bye to all your holiday visitors.

Materials
  • Clean plastic gallon milk jugs
  • Black permanent marker
  • Craft knife
  • String of 50 clear low-wattage holiday lights
Instructions
  1. Draw ghost eyes and mouths on the jugs. Tip: Leave the caps on while you do this, so the jugs don’t dent.
  2. Use the craft knife to cut a half-dollar-size hole in the back of each jug (a parent’s job).
  3. Arrange the ghosts near each other and string the lights between them, stuffing several bulbs into each of the jugs.

Coin Critters.

Practice learning American Coins with your host kids.

coin-critters-games-photo-420-FF1010MATHA10

  • The skills it builds: coin values, addition, and subtraction

    What You Need

  • Coins
  • Paper
  • Marker or crayons
Instructions
  1. Take some coins from your pocket or purse, lay them out on a piece of paper, and have your child draw arms, legs, and other body parts to create a creature.
  2. Then help her total up the value of the coins and write it beside the creature. Add or take away coins to form new shapes, and figure out the new sums.

Caramel Apples


Make some caramel apples with your kids to get into the carnival vibe and enjoy some yummy treats.

applesAll you need are apples, cubes of caramel, and milk!

  1. Remove the stem from each apple and press a craft stick into the top.
  2. Butter a baking sheet
  3. Place caramels and milk into a microwave bowl and microwave for 2 minutes.
  4. Roll each apple with caramel sauce and place on sheet to set.

PS – You can use treats like nuts, cookies, etc. to add some extra flavor! (Always check for allergies before serving)

Checklist Place Mat

checklist
Table your constant stream of morning reminders with this clever place mat, which allows kids to take responsibility for their own must-dos.
Materials
  • Decorative paper
  • Scissors
  • Glue stick
  • 18- by 12-inch sheet of poster board
  • Markers
  • Clear Con-Tact paper (or have it laminated at a copy shop)
  • Nontoxic dry-erase marker
  • Adhesive-backed Velcro dot
Instructions
  1. Cut three 6- by 12-inch rectangles from decorative paper. Use a glue stick to affix them side by side onto the poster board.
  2. Write a “Do at Home” checklist on the left rectangle and a “Take to School” checklist on the right one (leave a few blank spaces at the bottom of each list for write-in reminders).
  3. Have the place mat laminated at a copy shop or cover it with clear Con-Tact paper. Your child can use a nontoxic dry-erase marker to check off items or write additional reminders. Affix an adhesive-backed Velcro dot to keep the marker in a handy spot on the mat.

Make Your Own Blarney Stone

Blarney Stone CraftIn this simple project, a smooth river rock is turned into a small, kissable Blarney Stone.In southwestern Ireland, there is a very famous stone, called the Blarney Stone. It is located high up in Blarney Castle. If you kiss the Blarney Stone, it is supposed to give you the gift of eloquence.
Supplies needed:

  • A smooth, clean river rock
  • Brush
  • Green paint
  • Glue
  • Markers
  • Glitter, sequins, plastic jewels, googly eyes, bits of yarn, etc.
Make sure your rock is clean and dry. Paint the rock green.
After the paint is dry, decorate your rock using glitter, sequins, beads, plastic jewels, googly eyes, bits of yarn, or other interesting items.
When the paint and glue are dry, add details (like eyebrows, etc.) using markers.You now have your own small Blarney Stone to help you celebrate St. Patrick’s Day.