Tag Archives: Activities

Do you know Morse Code?

The inventor of the telegraph and Morse Code, Samuel Morse was born on this day in 1791. Morse Code is a system representing letters, numbers and punctuation marks by means of a code signal. It was the first electronic communication and International Morse Code, which uses only dots and dashes, is still used today. You can learn more about Morse Code and type text in to be translated to Morse Code for you to listen to by visitingwww.scphillips.com/morse.

Play post office!


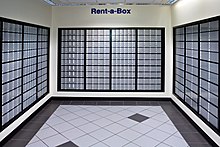
On this day in 1792 the first postal service was created in the United States. Preschool and young elementary age children will love to create their own post office at home. Buy some valentines on clearance or use what is around the house. You need envelopes (you can use new ones or save the return envelopes from junk mail), a rubber stamp and inkpad, stickers and some paper. Children can write a note or draw a picture to put in the envelope. They can use the stickers as stamps and the rubber stamp to make the “postmark.” They can deliver the mail to bedrooms or you can create mailboxes by stacking a few empty shoeboxes on their sides. There can also be a box to mail letters – use a larger shoebox or a small cardboard box with the top closed and cut a slot to put the letters through.

Play with peanut butter!

PeanutButter.jpg

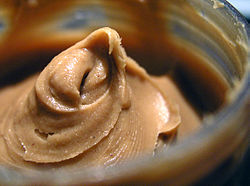
Peanut butter is a favorite food for many children in the U.S, and also a major allergen. Ask your host parents before feeding your host child peanut butter. Some children might like to eat it plain, but it is too sticky and can cause a child to choke. Always put the peanut butter on bread, a cracker, a piece of apple, a celery stick or some other fruit or vegetable.

Tired of eating peanut butter? The kids can play with it too! This is one of the few times it is really okay to play with your food as the play-dough is edible, but only for children over the age of one year.

Peanut Butter Play-dough

  • 3 1/2 cups peanut butter
  • 4 cups confectioner’s sugar
  • 3 1/2 cups honey
  • 4 cups dry milk powder

In a large bowl, cream together the peanut butter and confectioners’ sugar. Then beat in the honey and fold in the milk powder. Divide the dough into small portions and refrigerate or freeze until you are ready to use it.

It’s international drum month!

Here are instructions (from www.pbskids.org/zoom) for a drum experiment for school age children. Remind them that drums can be played softly too!

  • First get a container that you think will make a good drum, like a metal bowl or an oatmeal container. Sylvia says that larger containers make better sounds.
  • Put double-sided tape all the way around the container 2 inches from the top.
  • Cut 2 pieces of shrink-wrap big enough to cover the tape on the container. Then, push it onto the tape.
  • Tape the edges of the shrink-wrap with masking tape so it’s really secure.
  • Now blow-dry the shrink-wrap with a blow dryer set on hot. This shrinks the plastic and makes a very tight drum.
  • Be sure you don’t put the end of the blow dryer too close to the plastic, or it will melt.
  • Once it’s really tight, bang your drum.

Now it’s time to experiment. Try to change the sound your drum makes. Can you make a drum with a really deep sound? Test it out with different containers.

Younger children might like to use a coffee can or oatmeal box as a drum and bang on it along with some lively music.

It’s Potato Day

In the US we most often eat potatoes baked or fried. However, almost every culture has its own way of preparing potatoes – introduce your family to potatoes as you know them.

Potatoes are also useful for many craft projects. Cut one in half and carve a simple design into the cut end, then dip it in paint and use it for printing.

Cut an end off a sweet potato and let it sit in shallow water for several days. It will start to grow into a beautiful vine.

It’s National Watermelon Day!

A Summer Craft Recipe: Watermelon Magnets!

Use these on the refrigerator or give them as gifts. Suitable for ages three and older.

  • In a bowl mix 1/2 cup flour and 1/4 cup salt. Add 1/2 Tablespoon of olive oil, 1/8 cup warm water and 1/4 teaspoon red food coloring. Blend well and knead 20 times. If the dough is too sticky, add a bit more flour.
  • In another bowl mix 1/3 cup flour and 2 1/2 tablespoons salt. Add 1 teaspoon olive oil, 3 teaspoons warm water and a few drops of green food coloring. Blend well and knead 20 times, adding more flour if necessary.
  • Mold the red dough into flat circles and roll the green dough into a long snake shape and wrap it around the edges of the red circles. Press the two colors together so that they stick to each other.
  • Cut each circle in half and press 5 or 6 real watermelon seeds into the red part of the dough.
  • Bake the finished watermelon slices at 200 degrees for 2 hours. Turn them over and bake for 1-2 hours more until completely dry.
  • Glue a small magnet to the back of each.

It’s Harry Potters Birthday! Have a party!

504x504 Harry Potter Scar Clipart Free Clipart Images

Before embarking on a Harry Potter birthday party, start the magic by asking guests to come dressed as a character from the books. Some essential characters include: Hermione Granger, Ron Weasley (and the rest of his family), Neville Longbottom, Draco Malfoy, and of course, Harry Potter. Have older family members dress as professors from Hogwarts, such as Dumbledore, McGonagall, Snape, or even Hagrid. To start off the Harry Potter birthday party, have guests choose scenes to act out from one of the books for a fun activity that will put everyone in an enchanted state.

Harry Potter Birthday Party Tips:

  • Decorations
    Set the scene with candles, broomsticks, toy snakes, fake owls, and bats. For a magical touch, paint ping-pong balls gold, representing the Golden Snitch from the game of Quidditch. Hang them around the room with clear thread or fishing line. Display banners shaped like pennants with the house names printed on them. The house names and colors are: Hufflepuff (yellow and black), Ravenclaw (blue and bronze), Slytherin (green and silver), and Gryffindor (scarlet and gold).
  • Food and Drink
    Set up an area as the Leaky Cauldron. For Butterbeer, make root beer and ginger ale floats, pouring the soda over a scoop of ice cream in a clear cup or mug. Label food with magical names — cupcakes become “cauldron cakes” and malt balls are “chocolate frogs.” And naturally, you’ll need some jellybeans to stand in for Bertie Bott’s Every Flavour Beans. You can also put some jellybeans in a separate jar and have guests guess how many are inside.
  • Make Your Own Wand
    Have a crafts table stocked with straws and chopsticks for children to decorate and conjure up some fun. Creatively label yarn, feathers, and sequins with names like “Unicorn Hair,” “Phoenix Feathers,” and “Dragon Scales.” You’ll also need safety scissors, cardboard stars, colored markers, and glue.You can also have Harry Potter birthday party guests make their own wizard hats by making cones out of cardboard and decorating them with the same materials as the wands.
  • Magical Treasure Hunt
    Before guests arrive to the Harry Potter birthday party, hide golden eggs, a Sorcerer’s stone, plastic rings, Wizard’s gold, and other surprises around your house and/or yard. To make it challenging, hide riddles in easy-to-see places that give clues to where certain items are hidden. You or another family member can also act as a “gate keeper” for one-of-a-kind items like the Sorcerer’s Stone or a Goblet of Fire, requiring those who seek the prize to answer a riddle, give a certain amount of Wizard’s gold, or answer a trivia question. If you choose to challenge with Harry Potter trivia, make sure to have the books handy so kids can search for answers at the Harry Potter birthday party.

It’s National Ice Cream Day!

July 18th is National Ice Cream Day! Celebrate by enjoying a few scoops of your favorite flavor or by making your own ice cream at home. Here is a simple recipe. You can change it up by adding a little chocolate syrup, a few chocolate chips, or using a flavoring other than vanilla.
mixinbag

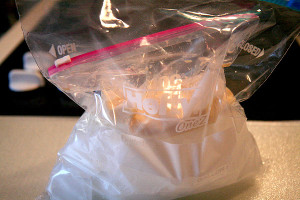
In a quart size zipper baggie, combine…
1 cup of whole milk or half and half
2 tablespoons of sugar
½ teaspoon vanilla extract

In a gallon size zipper baggie…
Fill ½ way with ice cubes
Add 1/3 cup of rock salt (if you don’t have rock salt you can use table salt or kosher salt)

Seal the small baggie carefully and place the inside of the large bag. Seal the large bag and shake the bags until you can see the mixture thickening (about 5 minutes.) It will be cold to hold, so you may want to carefully pass it back and forth between yourself and a partner.  Remove the small baggie and wipe the top off (to remove salt water,) unzip and enjoy!

It’s national sugar cookie day!

Sugar cookies are perfect for cutting out shapes with cookie cutters. Do it the easy way during the hot summer and purchase ready made dough in the freezer or refrigerator section of the grocery store.

Recipe:

  • Cream 1 cup (2 sticks) of butter with 2/3 cup sugar.
  • Beat in 1 egg.
  • Add 2 1/2 cups flour, 1/2 teaspoon salt, and 1 teaspoon vanilla.
  • Chill 3-4 hours before rolling.
  • Preheat oven to 350°F.
  • Spread a little flour on the counter to keep dough from sticking.
  • Roll 1/4 inch thick and cut into shapes using cookie cutters or a glass. Place on cookie sheet.
  • Bake 8-10 minutes or until slightly browned.
  • Allow to cool before eating.

photo by http://flickr.com/people/22334306@N02