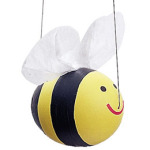
Bee Egg
With this project, kids blow an egg, then turn it into a flying wonder. All you need is a raw egg, paint, craft supplies, and fishing line for hanging the egg. The best part? This blown-egg creature will keep indefinitely.
Materials
-
- eggs
- newsprint
- egg dye
- paper towels
- birthday candles or crayons
- red and black acrylic or tempera paint
- brushes
- white tissue
- glue
-
- Blow the Egg: Wash and dry the raw egg. Cover your table with newsprint and set out bowls, pushpins, and paper towels. Shake the egg to break the yolk. Next, pierce the top and bottom with a pushpin, making the hole on the wider end a bit larger. Position the egg over the bowl and blow through the small hole, allowing the inside of the egg to seep into the bowl. Set the empty egg, with the large hole down, in an egg carton to dry. Be sure children wash their hands after handling raw egg.
- Degg-orate the Egg: Let the kids paint half of the egg, stand it atop a bottle cap to dry (use a hair dryer to speed things up), then paint the other half. Centering the face on either hole, paint on features with contrasting colors. Paint your bee bright yellow, then paint on a red smile, black eyes, and black stripes. Glue on white tissue paper wings.
- Take Flight: Tape a long length of fishing line to the end of an unfolded paper clip. Starting at the small hole, thread the line through the decorated egg and out the large hole. To keep your flying critter upright, tape the fishing line just above the hole in the critter’s back. Hang it from the ceiling or an egg tree.
Grow a Grassapillar
 Celebrate the arrival of spring by bringing this fuzzy critter to life.
Begin by mixing 3/4 cup of potting soil and 2 tablespoons of grass seed in a bowl. Add water to moisten the mixture, then set it aside.
Cut away a three-cup section of an egg carton, then trim the section along the longer edges so that your grassapillar will look the same from both sides. With a permanent marker, draw a face on one end as shown. Gently spoon the seed mixture into the cups.
Set your creation on a dish in a brightly lit spot and keep the soil moist. The grass should sprout in about a week.
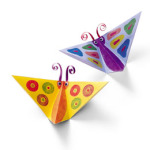 Origami Butterfly
Origami, Japan’s traditional craft of paper-folding, has been used since the 10th century to sculpt animals and wrap gifts. Animals, birds, fish and insects are favorite origami subjects. After folding the butterfly featured here, you can make it flutter by pressing on its back with the tip of your finger.
- Materials
-
- 6 x 6-inch sheet of origami paper
- Glue
- 1 x 4-inch strips of origami paper or curling ribbon
- Scissors
- 2 googly eyes
- Markers
- Instructions
-
 This colorful creature is created not by metamorphosis but by folding the origami paper in half to form a triangle.
 Fold the triangle in half again.
 Unfold the second triangle, then fold each side so that it crosses the center crease at a right angle.
 (Continuation of above directions.)
 Unfold. Glue on the strips for antennae and curl them using the edge of a scissor. Glue on the googly eyes and decorate with markers.