Valentine’s Day (February 14) is a time of love, friendship, giving, and caring. Americans use Valentine’s Day as an opportunity to tell friends and family how much they care. Children usually exchange cards at school.
Are you looking for Valentine’s day activity and craft ideas?
Look no further… Au Pair in America has a Pinterest pinboard devoted to Valentine’s Day:
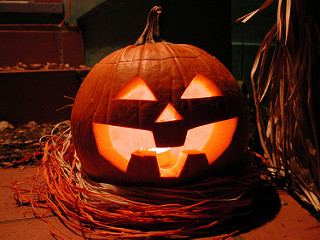
A treasured fall/Halloween tradition in the United States is pumpkin carving or making “jack-o’-lanterns”. Whether this is your first time decorating a pumpkin or you are a seasoned pro, these videos have a few tips and ideas you may find helpful.
How do I make it safe for the children? If you are carving a pumpkin with your host child(ren), remember to be very careful with them around sharp tools. You can purchase kid-safe pumpkin carving tools that cut without a sharp blade. If you don’t have those, let kids help with all of the tasks that don’t involve a knife such as: picking the pumpkin, scooping out the insides, choosing the design and adding any other decorative touches. You can buy or print pumpkin templates online and school aged kids can use a thumbtack to mark the pattern on the pumpkin. Hereyou can find a free template and instructions on how to do this.
How long do they last? Carved jack-o-lanterns begin to deteriorate after just a few days outside (depending on the weather). Temperatures over 60˚F (15˚C), rain, and freezing then thawing all make them rot more quickly. So, if you want your pumpkin to be fresh on the big night, don’t carve it more than a few days before Halloween and/or keep it in a cool place.
Check out Au Pair in America’s Halloween Fun Pinterest board and our Fall Bucket List for more fall traditions and activities to try.
Here are video readings of two of my favorite pumpkin stories.
The pandemic has changed lots of things this year, but one tradition that experts seem to agree poses a low to moderate risk is visiting a pumpkin patch. Social distancing, mask-wearing and general hand sanitizing precautions should be taken to reduce the risk. We cannot go to the pumpkin patch as a cluster meeting, but it is still a great fall tradition you could experience with your host family or a friend.
Below is a list of some local pumpkin patches. Visit their websites for details before you go. Many are requiring advance registration to eliminate crowds and comply with social distancing requirements.
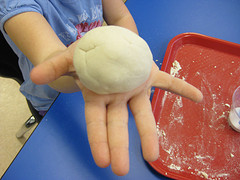
Play dough is the perfect modeling material for children. Their small hands can pat, poke, pinch, roll and knead it into many shapes. Keep it in an airtight container to use another day, or let it air dry into favorite shapes.
Measure 2 cups of flour, one cup of salt and 4 teaspoons of cream of tartar into a bowl. Add 1/4 cup of oil to one cup of water in a separate bowl then add the mixture to the dry ingredients. For colored play dough, squeeze 10-20 drops of food coloring into the water before you add it to the mixture. Cook the dough at low heat in a wide pan, stirring constantly until it becomes rubbery. Remove the dough from the heat and knead it for a few minutes. When it cools the kids can play too!
Valentine’s Day (February 14) is a time of love, friendship, giving, and caring. Americans use Valentine’s Day as an opportunity to tell friends and family how much they care. Children usually exchange cards at school.
Are you looking for Valentine’s day activity and craft ideas?
Look no further… Au Pair in America has a Pinterest pinboard devoted to Valentine’s Day:
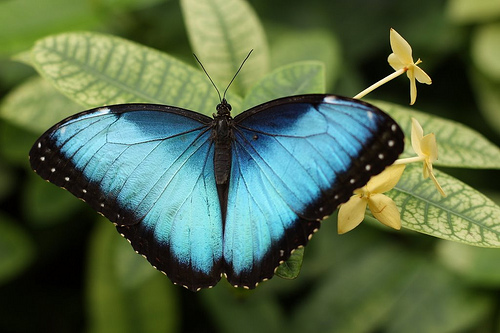
You will find lots of fun ideas for games, crafts, printables, activities and recipes to explore bugs and butterflies. Check out the Au Pair in America Pinterest Pinboard:
Father’s Day will be celebrated on June 21 this year. Dads love handmade gifts from their children. You’ll find lots of great Father’s Day projects here on the Au Pair in America Pinterest Pinboard: Father’s Day Ideas

 A treasured fall/Halloween tradition in the United States is pumpkin carving or making “jack-o’-lanterns”. Whether this is your first time decorating a pumpkin or you are a seasoned pro, these videos have a few tips and ideas you may find helpful.
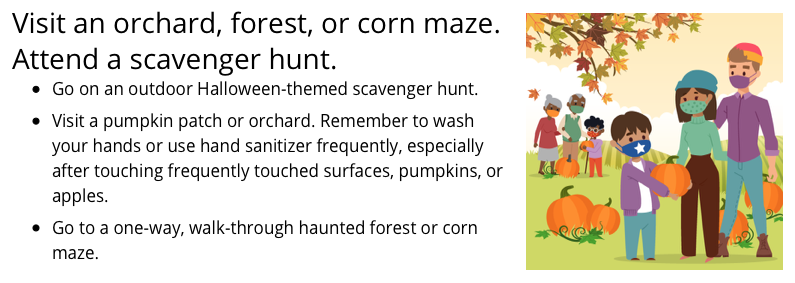
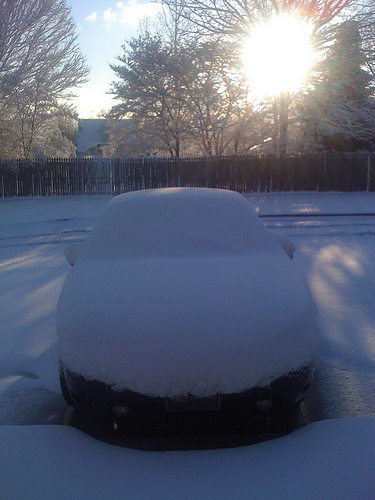 Here is a simple snow day game plan…