Tag Archives: fun

Edelweiss Hat- Celebrate Germany!

edelweiss hat

Oktoberfest in Germany celebrates the harvest – which ironically end at the end of September.  In Germany, celebrations for Oktoberfest are from September until the first weekend in October.  In the USA,  Oktoberfest is celebrated throughout the month of October (probably so we don’t get confused by the name?).     In honor of our German au pairs who are planning the Cultural Connection this month at our business meeting, here is a craft to do with your kids.

In the region of southern Germany known as Bavaria, you’ll often see men and boys in traditional folk hats graced with a feather or an edelweiss, a delicate Alpine flower. Our paper version of these hats offers both.

To make one, fold the green construction paper in half to make it 9 by 12 inches. Fold the two creased corners toward the center to make two 6-inch right triangles, leaving 3 inches at the bottom. Fold each 3-inch flap in half, then fold up again to form the brim. Cut a flower shape out of the white paper, glue on the yellow circle, and glue it to the hat’s brim. To make the chin strap, punch holes on each side of the hat’s brim, string the elastic through, and knot at each end. For a final touch, stick the feather in the fold of the hat.

MATERIALS

12 x 18-inch sheet of green construction paper
Scissors
3 x 3-inch square of white paper
Glue stick
Yellow paper circle, 1 inch in diameter
Hole punch
2 feet of elastic
Feather

Halloween Ghost Jug Decorations


spirit-jugs-halloween-craft-photo-260-FF1007TREATA13

Stationed on a walkway or porch, these homemade lanterns will extend a ghostly greeting and good-bye to all your holiday visitors.

Materials
  • Clean plastic gallon milk jugs
  • Black permanent marker
  • Craft knife
  • String of 50 clear low-wattage holiday lights
Instructions
  1. Draw ghost eyes and mouths on the jugs. Tip: Leave the caps on while you do this, so the jugs don’t dent.
  2. Use the craft knife to cut a half-dollar-size hole in the back of each jug (a parent’s job).
  3. Arrange the ghosts near each other and string the lights between them, stuffing several bulbs into each of the jugs.

Top Ten Activities for Fall

304381858_b394a4d708

Summer is over, and in many places the air is turning colder. As the weather changes be sure to take advantage of what the fall season has to offer. Even if you don’t live in a place that sees a lot colorful leaves, there are fun family-friendly ways to get outdoors this fall:

• Go apple picking. Sure, most of us can get apples year-round from the grocery store, but there’s nothing quite like orchard fresh apples, picked straight from the tree during harvest season. That crunchy, tangy, sweet apple flavor is at its peak during this time of year. Many commercial orchards will let you pick your own. It’s not only fun, it’s also a great way to show kids where their food comes from. Get extras for canning applesauce, or making pies. When you’re done, warm up with a delicious mulled cider.

• Go on a nature hike. Bring along a field guide to identify different kinds of trees. Look for wildlife collecting food for winter. Explain to kids how animals are starting to fatten up and grow thick, protective winter coats. Watch for migrating birds.

• Collect fall leaves. Press them into books or preserve them in glycerin. Paste them onto handmade paper to create greeting cards, or glue them between two pieces of wax paper to make an attractive sun catcher. Go lightly on the glue, or substitute crayon shavings to add color; use a warm iron to melt the shavings and hold the paper together.

• Take a hayride. Many farms offer hayrides during the fall. This is a great way to kick back and enjoy nature with smaller kids who may not be up for a long walk.

• Visit the pumpkin patch. Don’t buy your Halloween pumpkin from the grocery store. Go straight to the source. Kids will love wandering around the patch to pick out the perfect pumpkin. Choose a couple of big ones for jack-o-lanterns, and grab a few smaller ones for painting or general household decorations. Smaller pumpkins make great additions to fall centerpieces. Roast the seeds in your oven with a sprinkling of tasty spices, and grab a few to make pumpkin pies.

• Visit a corn maze. Many farms earn extra income for the winter by turning their cornfields into large mazes. Test your directional sense, and get some fresh air in the process. Corn mazes are fun or all ages.

• Stuff a scarecrow. Dig out an old shirt and overalls, and stuff it with leaves until firm. Add a pumpkin head (from your trip to the pumpkin patch) and you’ve got a great fall decoration.

• Fly a kite. The gusty, brisk air makes autumn a great time for flying kites. Buy one from the store, or make your own from two long sticks, strong paper, and string.

• Have a bonfire. Invite some friends over for a backyard bonfire. The chill in the air makes fall the perfect time to sit together by the warmth of a blazing fire with a nice warm mug of cocoa or cider. Be sure to get any necessary permits from your town first.

• Make a leaf pile and jump in!

Coin Critters.

Practice learning American Coins with your host kids.

coin-critters-games-photo-420-FF1010MATHA10

  • The skills it builds: coin values, addition, and subtraction

    What You Need

  • Coins
  • Paper
  • Marker or crayons
Instructions
  1. Take some coins from your pocket or purse, lay them out on a piece of paper, and have your child draw arms, legs, and other body parts to create a creature.
  2. Then help her total up the value of the coins and write it beside the creature. Add or take away coins to form new shapes, and figure out the new sums.

Caramel Apples


Make some caramel apples with your kids to get into the carnival vibe and enjoy some yummy treats.

applesAll you need are apples, cubes of caramel, and milk!

  1. Remove the stem from each apple and press a craft stick into the top.
  2. Butter a baking sheet
  3. Place caramels and milk into a microwave bowl and microwave for 2 minutes.
  4. Roll each apple with caramel sauce and place on sheet to set.

PS – You can use treats like nuts, cookies, etc. to add some extra flavor! (Always check for allergies before serving)

Checklist Place Mat

checklist
Table your constant stream of morning reminders with this clever place mat, which allows kids to take responsibility for their own must-dos.
Materials
  • Decorative paper
  • Scissors
  • Glue stick
  • 18- by 12-inch sheet of poster board
  • Markers
  • Clear Con-Tact paper (or have it laminated at a copy shop)
  • Nontoxic dry-erase marker
  • Adhesive-backed Velcro dot
Instructions
  1. Cut three 6- by 12-inch rectangles from decorative paper. Use a glue stick to affix them side by side onto the poster board.
  2. Write a “Do at Home” checklist on the left rectangle and a “Take to School” checklist on the right one (leave a few blank spaces at the bottom of each list for write-in reminders).
  3. Have the place mat laminated at a copy shop or cover it with clear Con-Tact paper. Your child can use a nontoxic dry-erase marker to check off items or write additional reminders. Affix an adhesive-backed Velcro dot to keep the marker in a handy spot on the mat.

National Peanut Butter Day

Today is National Peanut Butter Day.  Who would have guessed you can make Peanut Butter Lover’s Day a Craft Day!

ppbday

Other Things To Do:

  • Find out more about where peanuts come from.
  • Make home-made peanut butter.
  • Talk about the color brown/tan.
  • Try one of these Open-Faced Peanut Butter Sandwiches.
  • Go on a peanut hunt (hide peanuts all around the room for someone to search for).

Dr. Seuss Week — A Week to Celebrate Reading

cathat3

This week (March 1-5) many schools throughout the United States are celebrating the birthday of Dr. Seuss.  To honor Dr. Seuss’ love of reading and his inspiration for kids and adults alike,   March 3 is Read Across America Day. The National Education Association sponsors events to inspire reading in children throughout our schools and communities.

Dr. Seuss wrote many childrens books – Cat in the Hats, Green Eggs and Ham, Hop on Pop to name a few.  In the cluster monthly Kids Activity Kit for March, there is a Dr.Seuss Reading Rewards Card for each host child.  Punch out the colored dots for each book the children read.  After 15 books, complete the Dr. Seuss Reading Certificate and reward the children with a Dr. Seuss pencil (included in the kit).

My son’s school developed a week of celebrations based on the themes of the Dr. Seuss books.  This is a fun activity to do with your host kids at home.   Dig out the Dr. Seuss books – you will be surprised how much fun the books are to read and the rhyming will help improve your english.

Monday – “Red and White Day” – wear red and white to show Seuss Pride.

Tuesday – “Cat in the Hat Day” – wear your favorite hat to school.

Wednesday – “Grinch Green Day” – wear green, but don’t be as grumpy as the Grinch

Thursday- “Fox in Socks Day” – Roll up your pant legs and show off your cool socks.

Friday – “Sneak Up on Reading Day” – Wear your favorite sneakers and participate in “Drop Everything and Read.”

Check out the Dr. Seuss website

Seussville

for more ideas, printables and on line games to play with the kids.  Enjoy!


Valentine’s Day Activities.

Valentine’s Day (February 14) is a time of love, friendship, giving, and caring. Americans use Valentine’s Day as an opportunity to tell friends and family how much they care.  Children usually exchange cards at school.
Are you looking for Valentine’s day activity and craft ideas?

Look no further…  Au Pair in America has a Pinterest pinboard devoted to Valentine’s Day:

APIA Valentine’s Day Pinboard

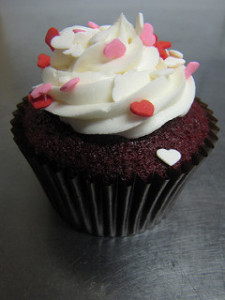
Photo: Clever Cupcakes (Flickr)

Crayon Valentines

Re-cycled Crayon Valentine’s

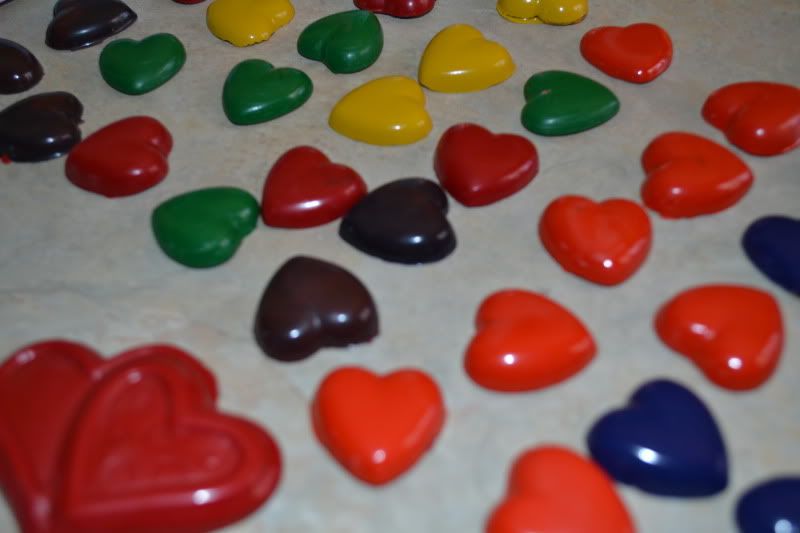
If you’re looking for the easiest way to make heart-shaped crayons, you’re best bet is heart shaped silicone molds that you can place directly into the oven.  Here’s a great tutorial for that.  I, unfortunately, did not have silicone molds at home.  I had plastic heart molds (and, by golly, we were going to use them!!).  So, I scoured the internet for alternative methods and picked the easiest things I could that we had on hand.  Here’s what we ended up with:

Ingredients:
Lots of  broken crayons (Update:  Be sure to use Crayola’s instead of generic crayons for the best results)
Plastic heart-shaped candy molds
Glass Jars  (old pickle, jam, relish, etc. jars)
Chop Sticks (for stirring)
Pot-holders

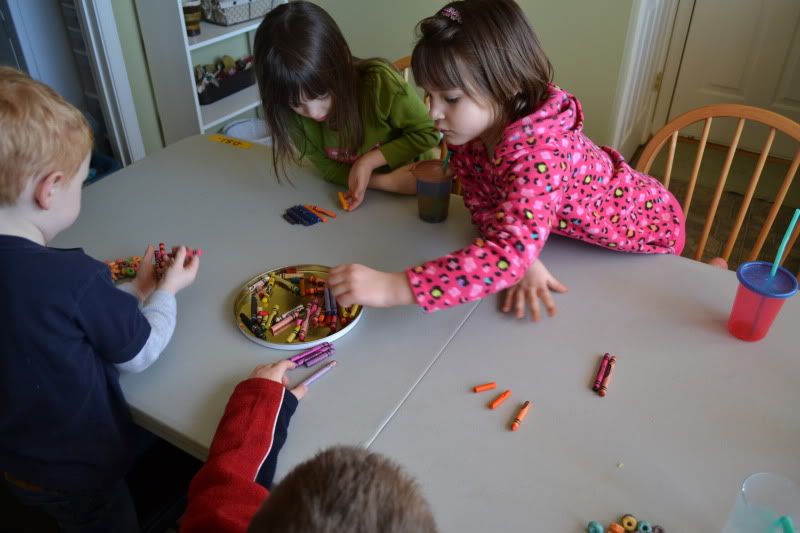
1.  The kids got to work pulling out all the broken crayons from our big tub of crayons.  Then they sorted them by color and began unwrapping them.  (I used a knife to score the sides of the wrappers to make this easier.)

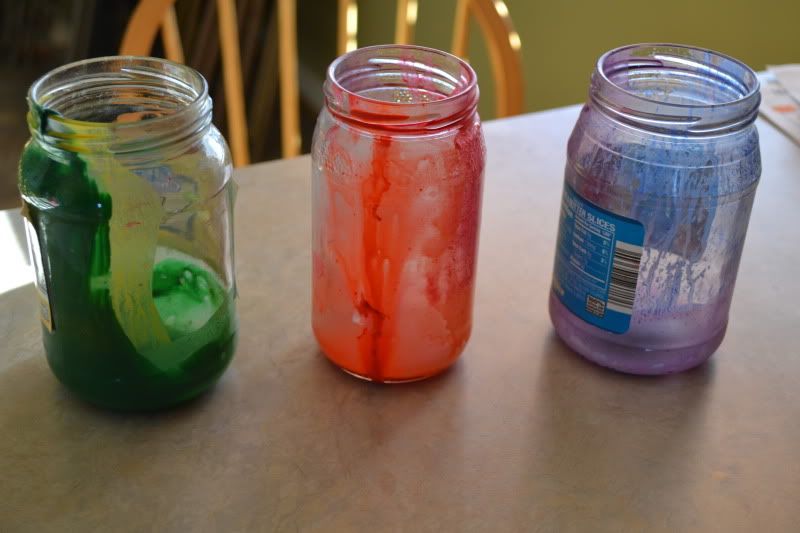
2.  Then, we put each color into a different jar.  (One site recommended Dixie cups for this part and another said that aluminum cans in a water bath on the stove could be substituted.  We did not have either of those.)  I only had 3 jars so we did the lighter colors first and kept like colors together.

3.  Microwave each jar for 3-5 minutes, stirring occasionally with the chop sticks.  Caution:  THE JARS WILL BE HOT!!!  Be sure to use a pot-holder or towel to remove them from the microwave.

4.  Once melted, pour the wax into the candy molds and let settle for a few minutes.  Then, they can safely be transferred to the freezer.  After a few minutes in the freezer, they will pop right out of the molds.

*We did one color at a time since we only had two molds and colored pictures in between colors.

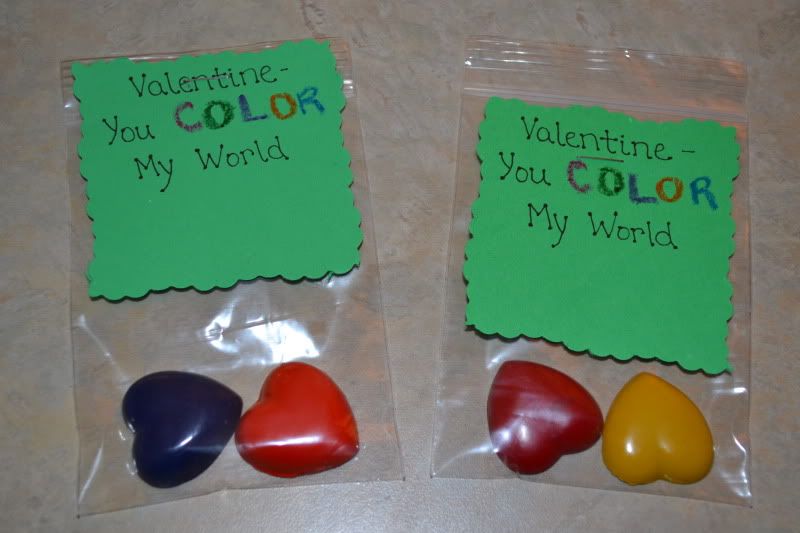
5.  Then, we bagged up a few crayons for each child in small ziplock bags found in the bead & jewelry section of any craft store and added a little note that read “Valentine, You Color My World.”

Super cute!!  Of course, next year I think we’ll just invest in the silicone molds ?